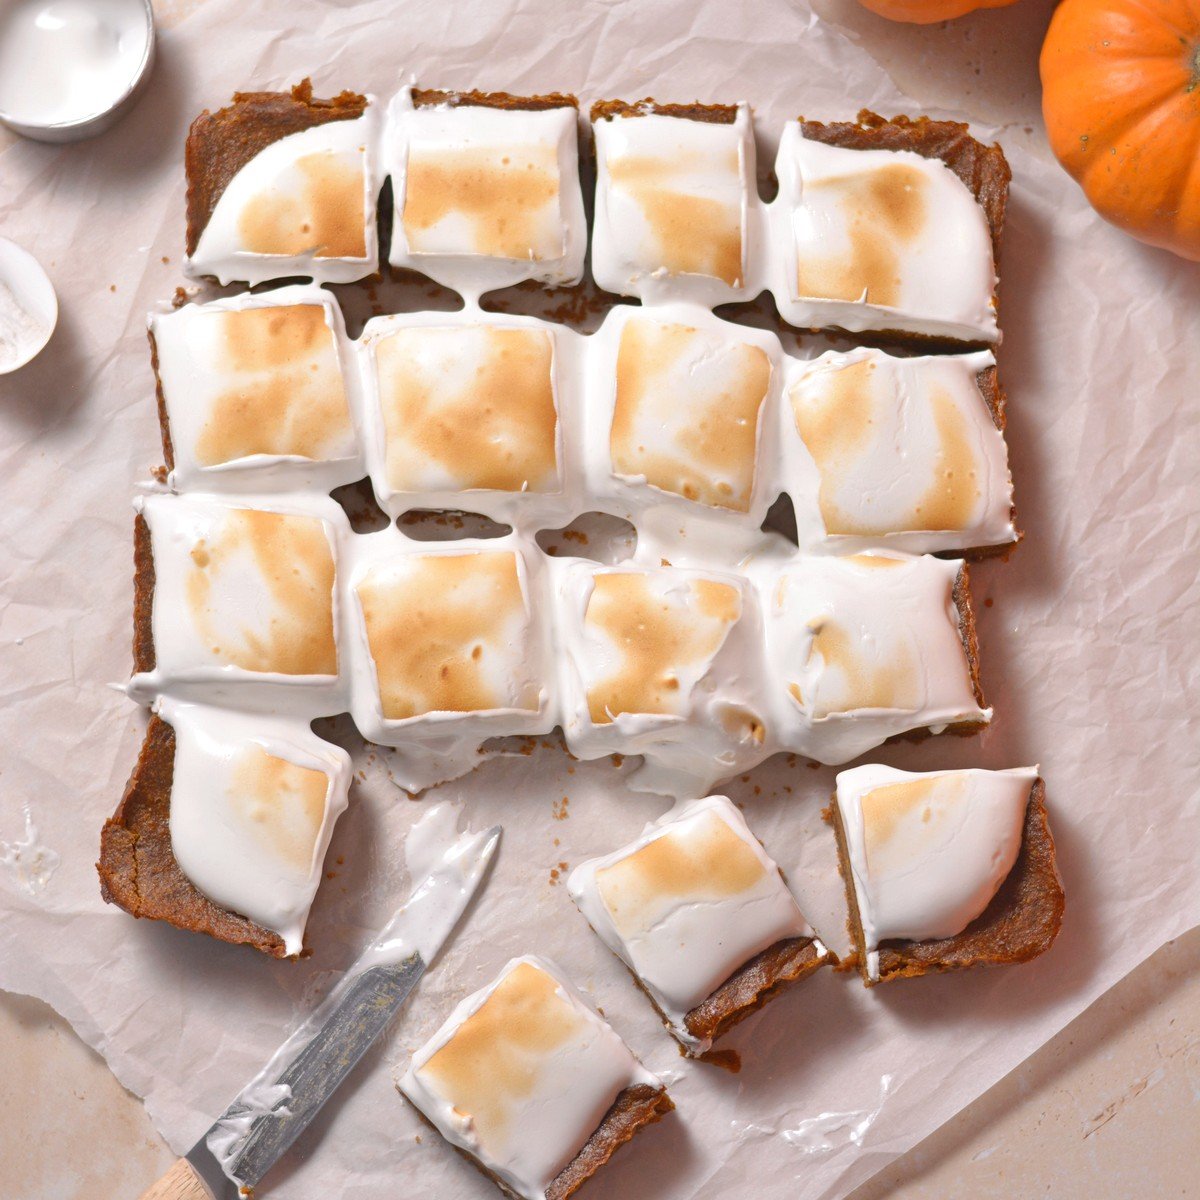
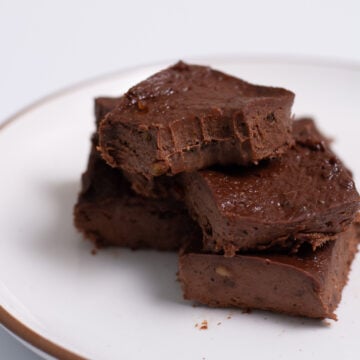
These dairy-free pumpkin pie bars with a graham cracker crust are like a classic pumpkin pie made better! These pumpkin bars are made with pantry staple ingredients, can be made in advance, and pack a flavor punch thanks to sharp ginger and creamy cinnamon meringue.
Want to save this recipe?
Enter your email below & we'll send it straight to your inbox. Plus you'll get fun new recipes from us every week!
Jump to:
why these bars are better
- Best made the day before because pumpkin bars are ALWAYS better cold. And a bonus is that making them the day before you want them saves time on the day of the event (*cough* thanksgiving). Plus, then you don’t have to show up to someone's house asking to use the oven because your bars can just chill in your cooler until ready to serve.
- Meringue topping is creamy and sweet, making it the perfect topping for pumpkin bars. Plus, when kept in the fridge, it will hold its shape for up to 2 days.
- Simple ingredients are what make up these pumpkin pie bars. The hardest ingredient to find might be the actual pumpkin because it sells out so fast!
ingredients and substitutions
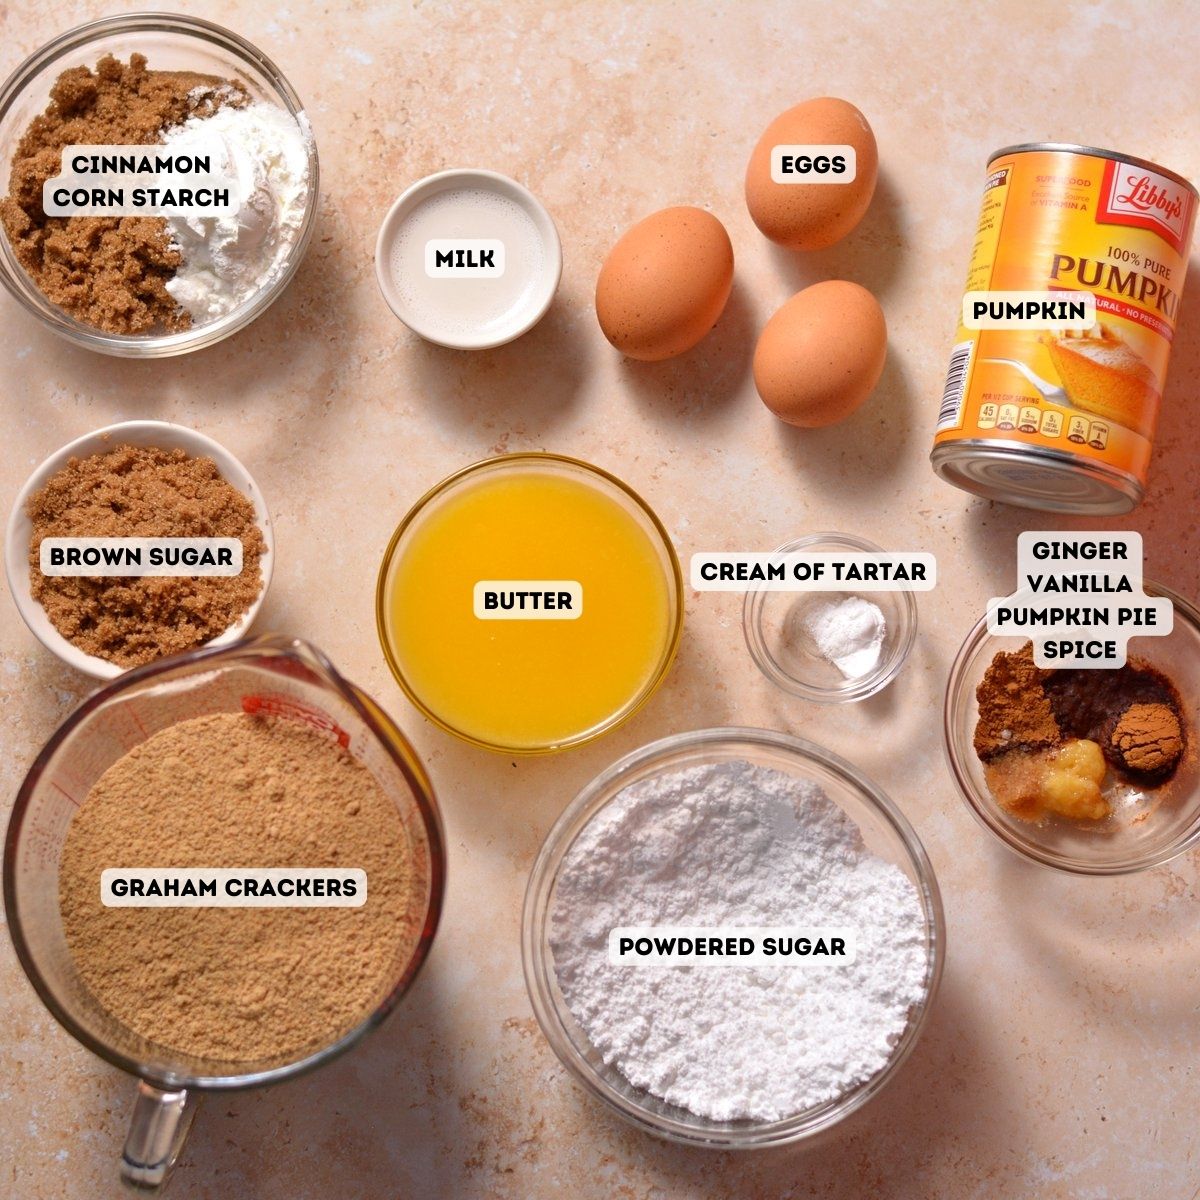
All substitutions are a 1:1 substitute unless otherwise noted. See recipe card for quantities.
Crust Ingredients
- Graham crackers: Feel free to use regular or cinnamon. You can also use gluten-free or grain-free if needed (often labeled as “cinnamon cookies” or just “grahams”). There are some great almond flour or cassava flour-based cinnamon cookies that will work!
- Butter: Vegan butter, margarine, or coconut oil can be used.
- Brown Sugar: Coconut sugar can be used but it’s not as sweet so you may want to add more sugar to the filling (adding it to the crust will change the structure of the crust).
Filling Ingredients
- Pumpkin: Just be sure to use 100% pure canned pumpkin puree, not pumpkin pie filling.
- Milk: We use oat milk, but any milk you like will work. Almond milk, coconut milk, or any other plant-based or cow's milk will work.
- Ginger: Minced ginger or freshly grated works best, but you can also use ¼ teaspoon of powdered ginger if you don’t have fresh ginger.
- Pumpkin Pie Spice: If you don’t have pumpkin pie spice, you can use 1 teaspoon cinnamon, ½ teaspoon ginger, and ½ teaspoon nutmeg.
- Spices: Cinnamon, salt, and vanilla all help these bars to pack in the flavor.
- Brown sugar: Coconut sugar or pure maple syrup can be used. If using coconut sugar in the crust, double the sweetener used in the filling.
- Corn starch: Arrowroot flour or tapioca starch can also be used. If using tapioca, double the quantity (2 tablespoon tapioca = 1 tablespoon corn starch).
- Egg yolks: We need 3 eggs for this recipe. The bar filling uses the egg yolks.
Meringue Ingredients
- Egg whites: And the meringue topping using the egg whites!
- Powdered Sugar
- Cream of Tartar
- Optional add-ins: Salt, vanilla, or cinnamon can all be added to flavor the meringue.
This recipe has not been tested with other substitutions or variations. If you replace or add any ingredients, please let us know how it turned out in the comments below!
recipe testing notes
Throughout our testing of these dairy-free pumpkin pie bars, we learned what worked and didn't work. Here are the key takeaways!
- The milk doesn’t matter: We tested this recipe with heavy cream, regular milk, coconut milk, and oat milk. All worked great! The only difference is if you freeze the bars, using heavy cream resulted in less of an icy texture in the pumpkin custard.
- Eat them cold: There is just something about cold custard-based pies where the flavor is like double the strength as it is warm. I’m still trying to track down the science behind this but in testing, we discovered that if refrigerated for a few hours the bar's flavor is amazing!
how to make these pumpkin bars
Be sure to scroll to the recipe card for the full dairy-free bar recipe!
Step one: make the crust
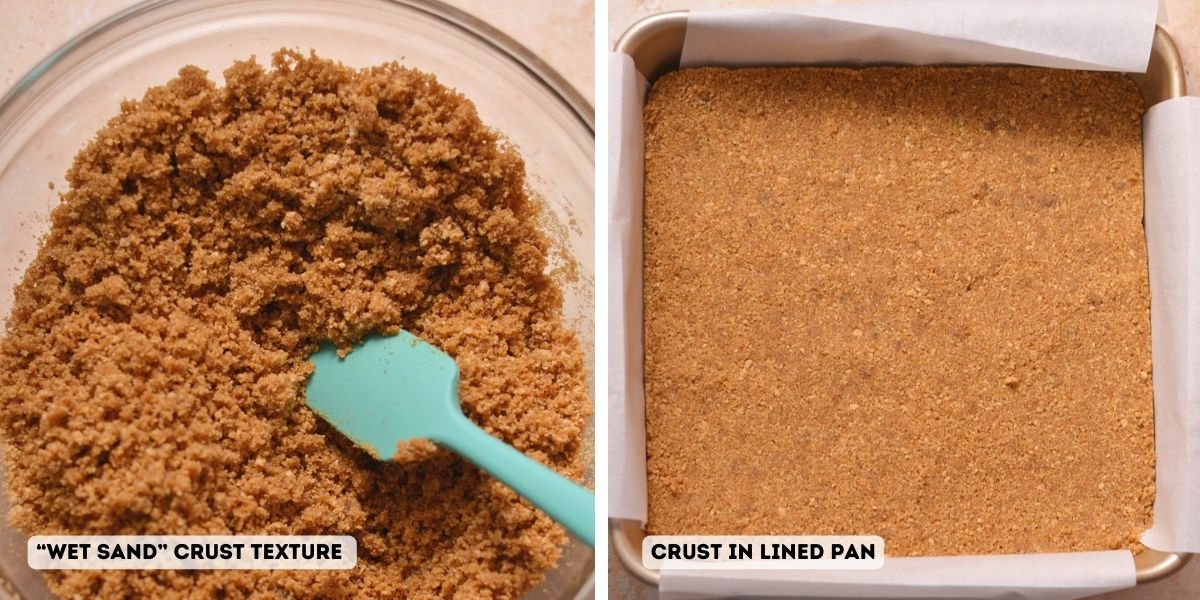
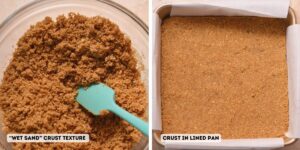
Pulverize the graham crackers and combine them with the other crust ingredients. Press into a square pan that's lined with parchment paper. Bake at 350 degrees for 10 minutes.
Step two: make the filling
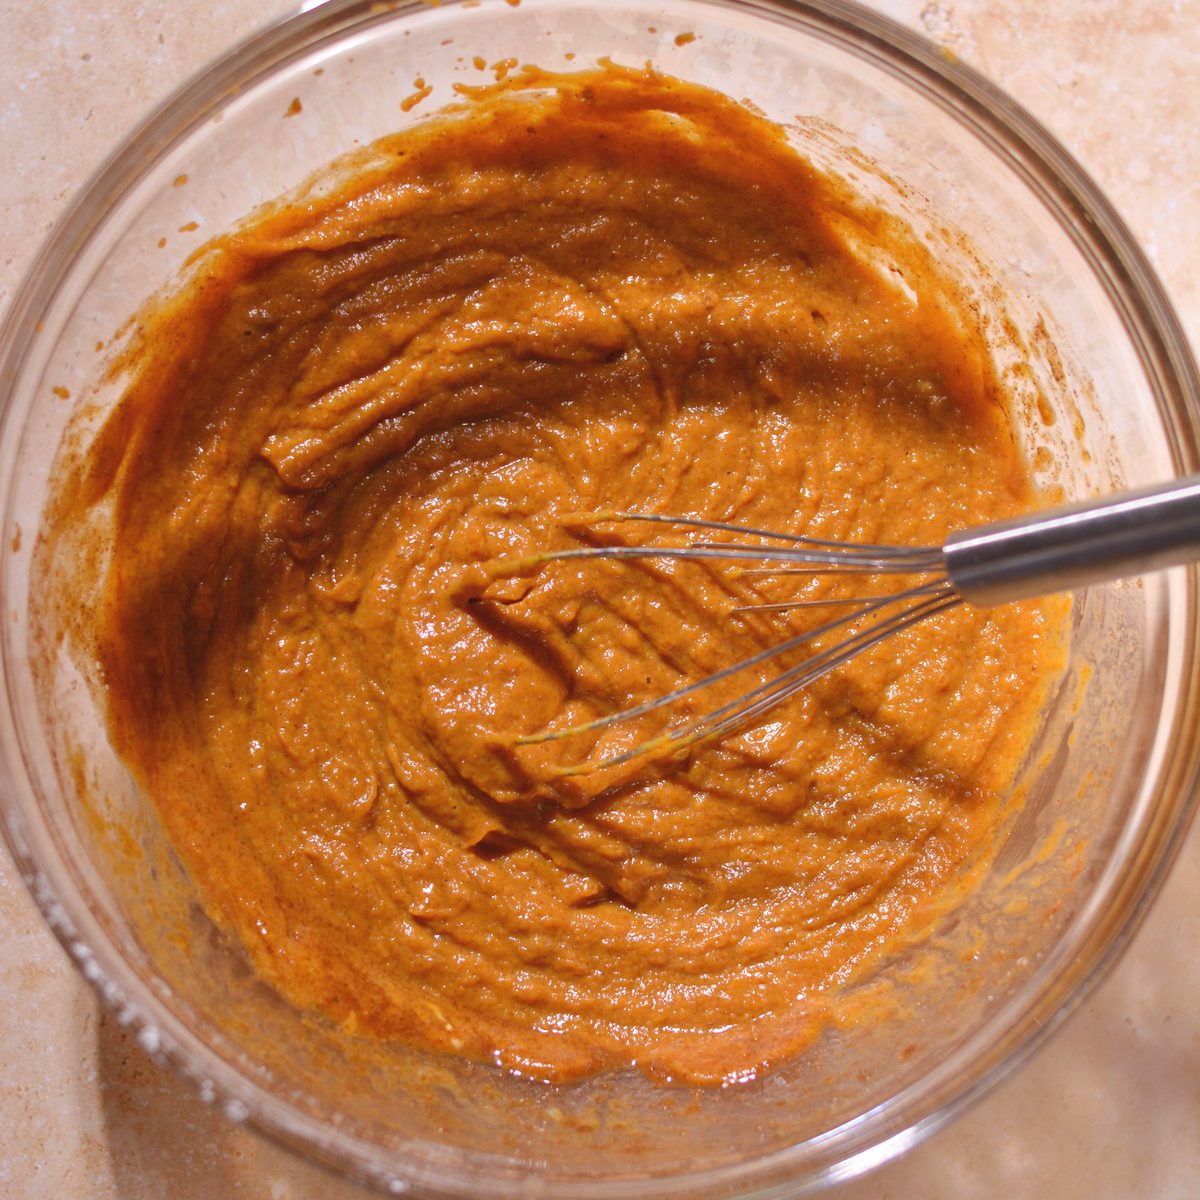
While that bakes, whisk together all the pumpkin bar filling ingredients. Store the egg whites in the fridge until ready to use.
Step three: combine
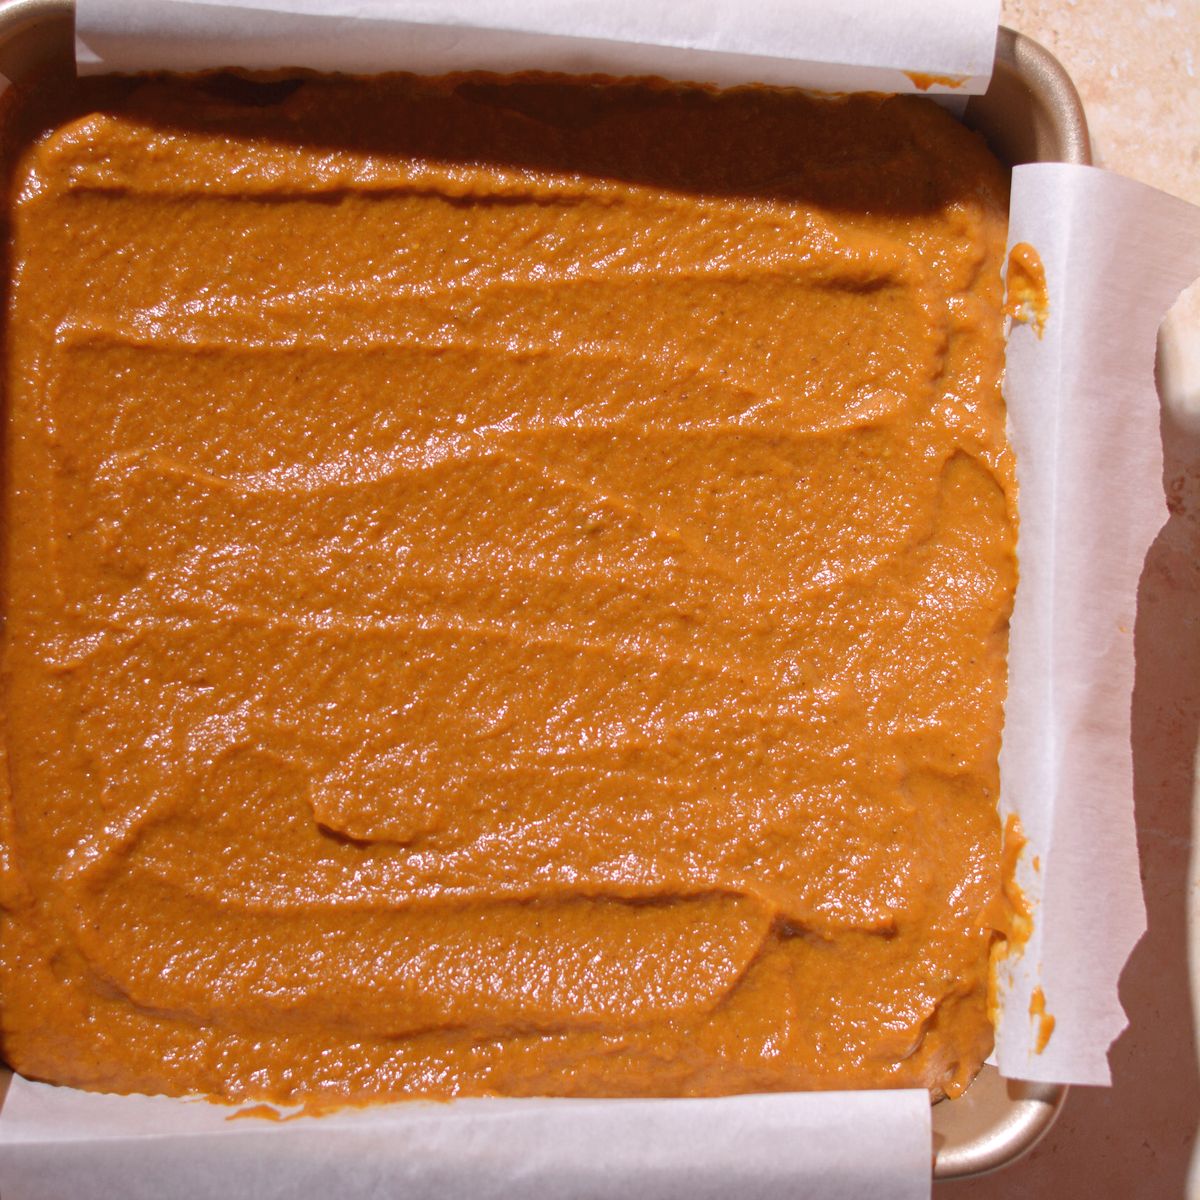
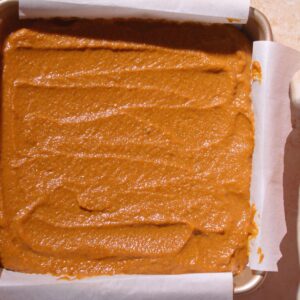
Remove the crust from the oven and pour the pumpkin mixture on top. Smooth it out and return to the oven for 30-35 minutes.
Step four: cool
Let the bars come to room temperature or at least cool enough to handle. Then cool in the fridge for a few hours.
Step five: make the meringue
Whip the egg whites and cream of tartar till soft peaks form. Then add in the sugar ¼ of a cup at a time. Whisk for 30 seconds to a minute each time you add sugar. Continue to whisk until the meringue is glossy. For these bars, you don’t need super stiff peaks.
Step six: top
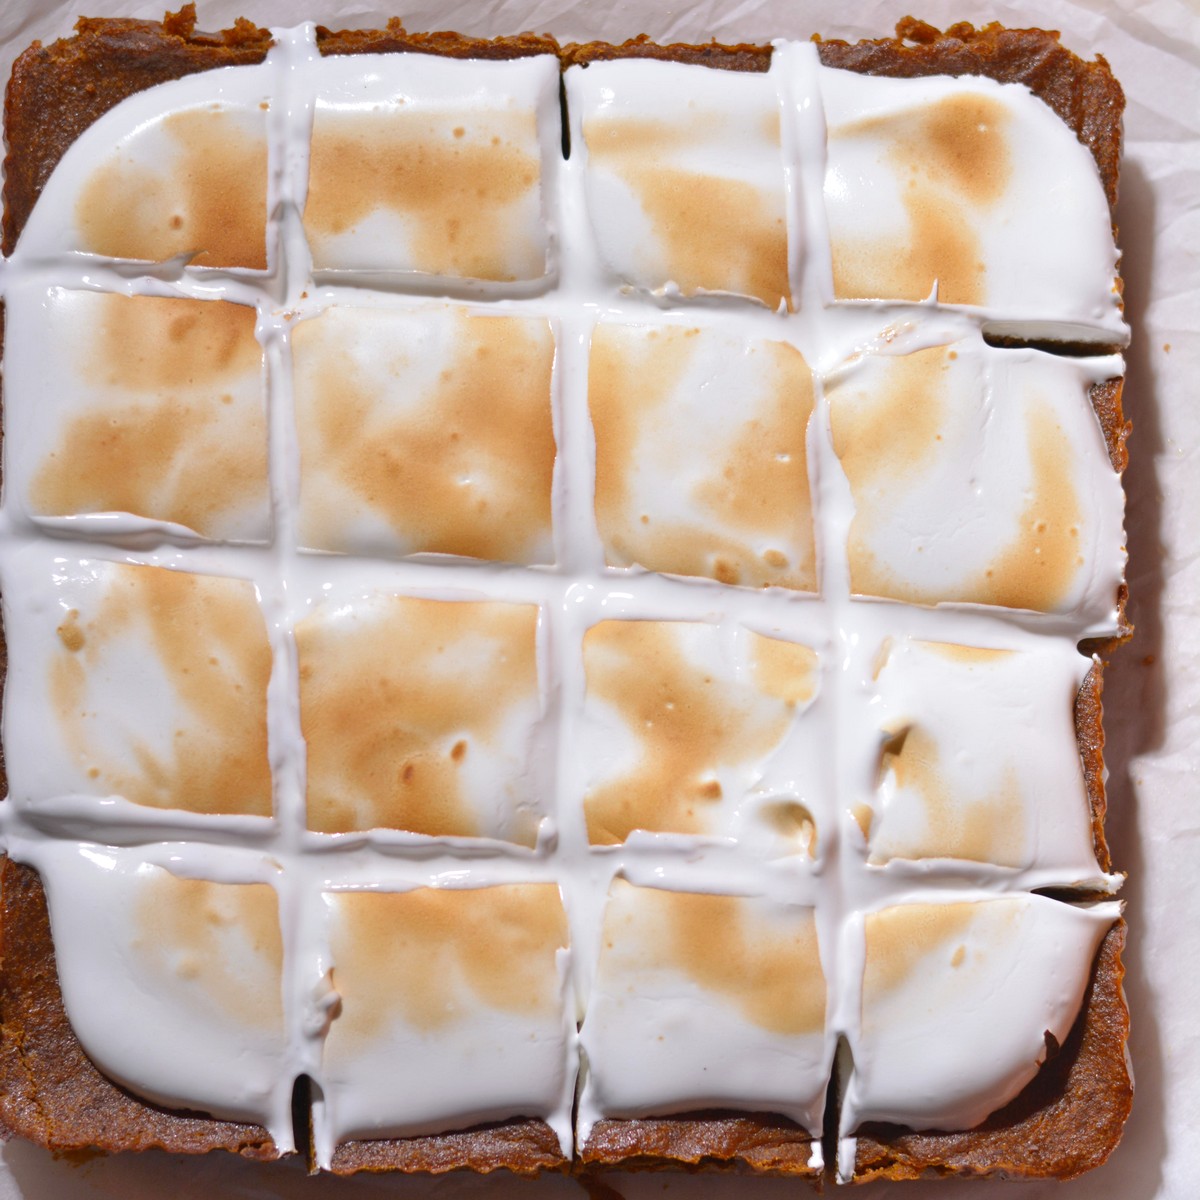
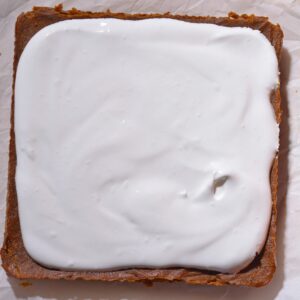
Spread the meringue on top of the bars, cut, and enjoy! It's optional to toast it using a torch or broil on the oven.
prefer to watch how to make these?
helpful tips
- Use a rubber spatula: This is the easiest way to press the crust into the pan so you get one even layer.
- Keep mixing the crust: The crust ingredients may seem dry at first, but just keep working the butter through crumbs until you get a wet sand texture.
- Make the bars fully the day before: In testing these bars, the meringue will hold up for up to about 24 hours. This means you can fully make the bars the day before and then just grab and go on the day of to serve them. Just wait to slice them until right before serving.
- Line the tray: These bars can be hard to get out of the tray so I like to line the baking dish with enough parchment paper to grab the side and lift the bars out. You can also leave them in the tray, slice them, and then dollop each slice with meringue to serve straight from the tray.
common questions
Nope, just keep whipping the meringue until it’s nice and glossy!
Pure pumpkin filling only contains pumpkin while pumpkin pie filling has added sugar and spices.
The custard should be slightly brown and stiff to the touch while also still having a bit of a wobble to it.
Definitely. You can simply top it with whipped cream or coconut cream.
Yes, see our chart below for different bake times. Just as a note, our recipe bake times are based on the crust being between a ¼" and a ½" thick and the custard being about 1" thick. As a reminder, bake times are based on the thickness of the custard and crust. So if the pan size is different but the crust and custard are the same thickness, the bake time remains as written.
different bake times for different sized pans
| Batch Size | Pan Size | Bake Time |
| Half | 9"x5" loaf pan (or similar) | 30-35 minutes |
| Full | 8" or 9" Pie pan or tart | 30-35 minutes |
| Full | 9"x5" loaf pan (or similar) | 50-55 minutes |
| Double | 9"x13" | 35-40 minutes |
| Double | 9"x9" square | 50-55 minutes |
recipe variations
Vegan Pumpkin Pecan Pie
To make these bars into a vegan pumpkin pie recipe, use 1 cup of coconut milk, leave out the eggs, and increase the cornstarch to 6 tablespoons. For the pecan base, use pecans instead of graham crackers and use coconut oil or vegan butter. Top with coconut cream or other vegan whipped cream.
Crustless Pumpkin Pie Bars
To make these bars crustless, simply don’t use the crust. The custard will hold its shape without the crust! This is a great way to make gluten-free pumpkin pie bars without needing special ingredients like almond flour, coconut flour, or almond meal.
storage tips
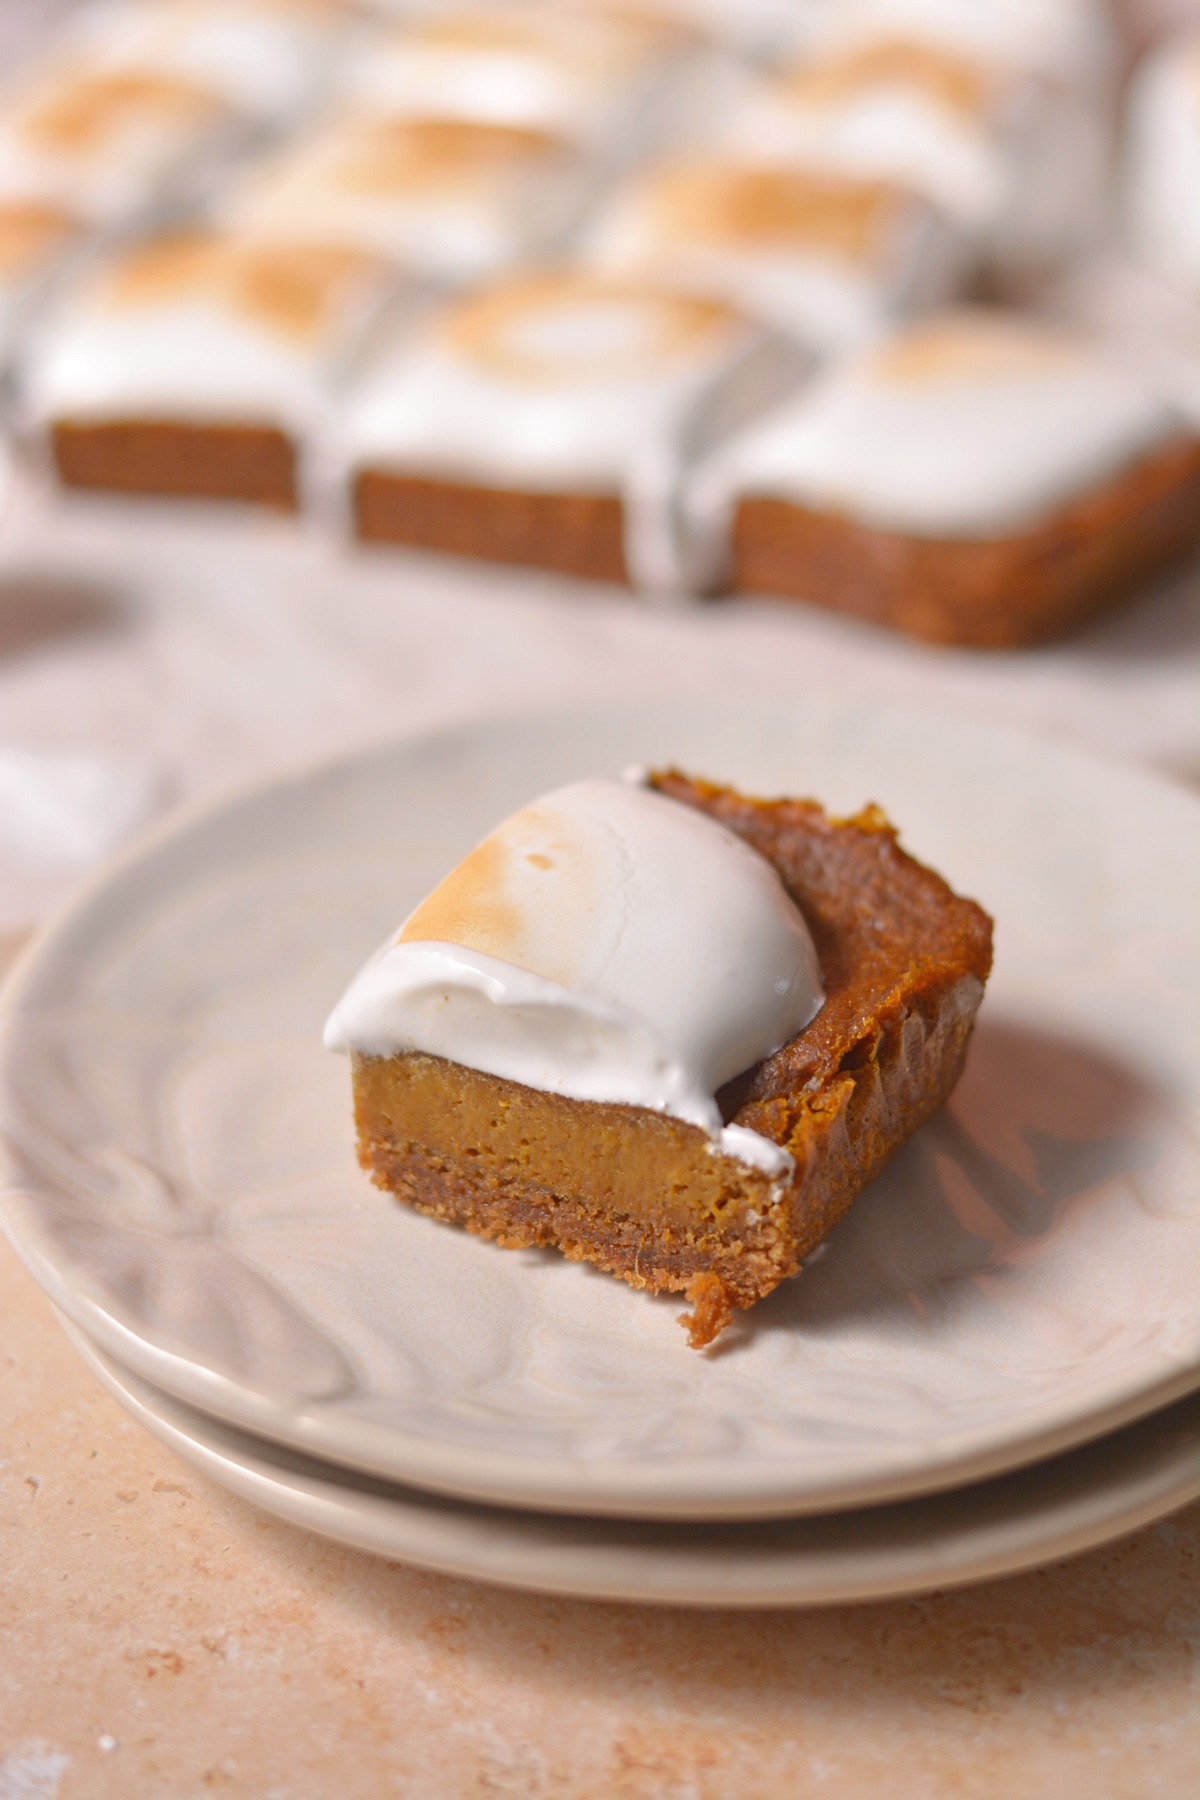
Fridge: Simply cover with plastic wrap or place in an air-tight container. Store in the fridge for up to 5 days. The meringue will start to wilt after 1 day, but don’t worry it still tastes great!
Freezer: Store in an airtight container or covered in plastic wrap and in a plastic bag. These will keep for 3 months in the freezer. I find it best to freeze them sliced into individual bars.
When you want to eat them, just let the pumpkin bars sit out for 5 minutes to soften a bit. The custard will become slightly icy but otherwise, they taste great and freezing helps to preserve the meringue texture.
more desserts using a cookie crust
Did you try this and love it? Leave us a ⭐️ rating, we would love to hear from you!
Recipe
Dairy-free Pumpkin Pie Bars with a Graham Cracker Crust
Equipment
- 2 medium bowl
- 1 8" x 8" square pan
Ingredients
Crust Ingredients
- 1.5 sleeve graham crackers crushed (14 crackers, turns into 1.5 cups pulverized, use gluten free as needed)
- 6 tablespoon butter melted (or vegan butter or coconut oil)
- ⅓ cup brown sugar (or coconut sugar (see notes for using this))
Pumpkin Custard Ingredients
- 15 oz can of pumpkin puree
- ¼ cup milk (plant-based or cow's)
- 1 teaspoon ginger minced (or ¼ teaspoon ground ginger)
- 1.5 teaspoon pumpkin pie spice (see notes for alternatives)
- ½ teaspoon cinnamon
- ½ teaspoon salt
- 1 teaspoon pure vanilla
- 3 tablespoon corn starch (or arrow root flour or tapioca starch)
- ¾ cup brown sugar (or coconut sugar or maple syrup, see notes for using coconut sugar)
- 3 egg yolk
Meringue Ingredients (optional, can use whipped cream instead)
- 3 egg whites
- ¼ teaspoon cream of tartar
- ¾ cup powdered sugar
- optional: vanilla, cinnamon, or salt
Before you start!
If you make this recipe, please take a moment to leave us a review. We love to hear from you!
Instructions
- Prepare: Separate the egg yolks from the egg whites. Store the egg whites in the fridge until ready to use. Pulverize or crush the graham crackers either with a food processor, a blender, or by putting them in a plastic bag and crushing them with a rolling pin. Preheat the oven to 350 degrees.Line an 8" x 8" pan with parchment paper so it hangs over the edges. See notes for baking in a different sized pan.
- Make the crust: Mix the melted butter, graham crackers, and brown sugar until it resembles wet sand. Press this into your lined pan using your hand or a spatula. Bake this for 10 minutes
- Make the custard: Whisk together all pumpkin pie filling ingredients until smooth.
- Combine: Remove the crust from the oven and pour the custard on top. Smooth out the top. Return to the oven to bake for another 30-35 minutes. When it's done, the top will be golden brown, stiff to the touch but will still have a slight wobble. Let it cool enough to handle and transfer to the fridge to cool completely (about 2 hours).
- Make the meringue: When the bars are almost cool (or when you want to serve them), make the meringue by whipping the egg whites and cream of tartar into soft peaks. You can do this with a whisk (or immersion blender with a whisk attachment), hand mixer, or in a stand mixer. Once soft peaks form (this can take upwards of 5-7 minutes depending on the method you use), add the powdered sugar ¼th of a cup at the same time. Mix for 30 seconds to a minute each time after adding the sugar. Add in vanilla, cinnamon, or salt if desired. Keep mixing until the meringue becomes glossy. They do not need to be stiff peaks for these bars.
- Combine: Top the bars with the meringue, slice, and enjoy! You can also slice the bars and then dollop the meringue on each bar. You can also toast the meringue using a torch or the broil setting on your oven. Or, you can just use coconut whipped cream.
Video
Notes
- Use a rubber spatula: This is the easiest way to press the crust into the pan so you get one even layer.
- Keep mixing the crust: The crust ingredients may seem dry at first, but just keep working the butter through crumbs until you get a wet sand texture.
- Make the bars fully the day before: In testing these bars, the meringue will hold up for up to about 24 hours. This means you can fully make the bars the day before and then just grab and go on the day of to serve them. Just wait to slice them until right before serving.
- Line the tray: These bars can be hard to get out of the tray so I like to line the baking dish with enough parchment paper to grab the side and lift the bars out. You can also leave them in the tray, slice them, and then dollop each slice with meringue to serve straight from the tray.
| Batch Size | Pan Size | Bake Time |
| Half | 9"x5" loaf pan (or similar) | 30-35 minutes |
| Full | 8" or 9" Pie pan or tart | 30-35 minutes |
| Full | 9"x5" loaf pan (or similar) | 50-55 minutes |
| Double | 9"x13" | 35-40 minutes |
| Double | 9"x9" square | 50-55 minutes |
Looking for more information?
Additional substitution information can be found above in the substitution section of this post.
Nutrition Disclaimer
Nutritional information is an estimate and for informational purposes only.

drop us a note!