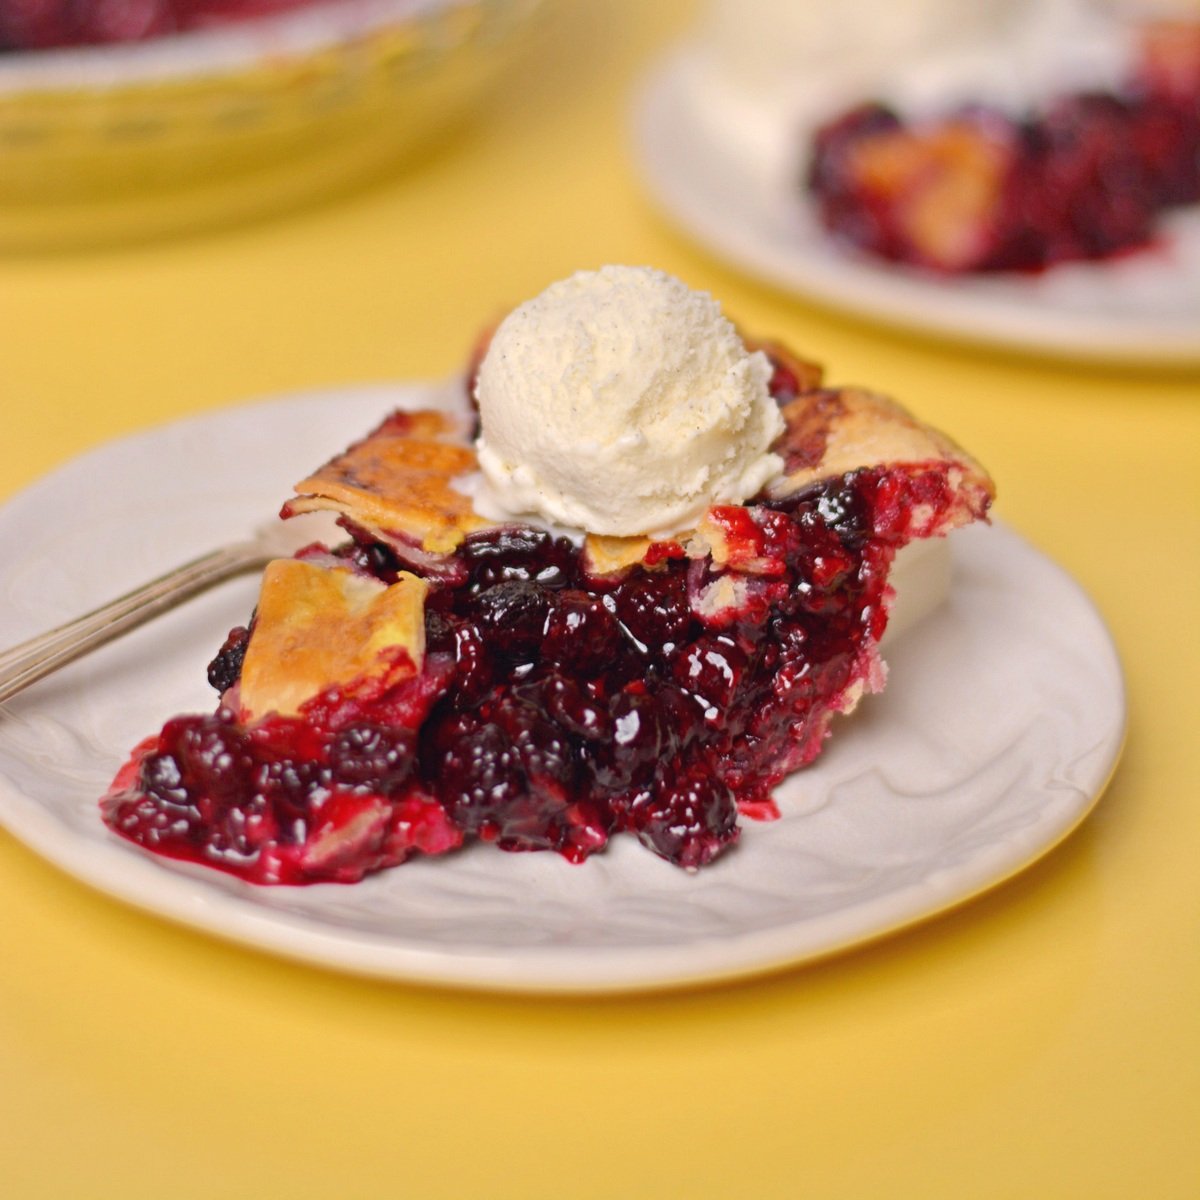
This black raspberry pie recipe is made with just a few simple ingredients! Refreshing black raspberries, tart orange zest, and an easy premade buttery crust makes this the perfect balance of sweet and sour for a summer pie! Plus, it’s vegetarian and made with natural sugar.
Our reader, Tam, had this to say: "This is the best black raspberry pie I have ever tasted! Love that it used honey instead of processed sugar. Thank you" ★★★★★
Want to save this recipe?
Enter your email below & we'll send it straight to your inbox. Plus you'll get fun new recipes from us every week!
Summer means berries and berry pies. And in the Midwest, we have TONS of these unique little berries known as black raspberries. These berries are exactly what they sound like - raspberries that are black. They only grow in northern climates, so while we might have tundra-like winters, at least we have black raspberries!
I grew up picking blackberries with my grandparents every summer. We would gather buckets full and then make berry tarts. So it was only natural that when I discovered we had our own berry patches in the woods, I make pie! And just a note, while I use black raspberries, you can use whatever berries (fresh or frozen) you have on hand.
For our pie recipe, we use honey for natural sugar, orange juice for brightness, extra corn starch for extra gooeyness, and premade pie crust because I don't like to spend my whole day making a single pie. If that all sounds good, keep scrolling to learn how to make this 5 ingredient berry pie!
Have more black raspberries to use? Try these other black raspberry recipes: Black Raspberry Lemonade Smoothie or Black Raspberry Chocolate Chip Ice Cream.
Jump to:
Ingredients and Substitutions
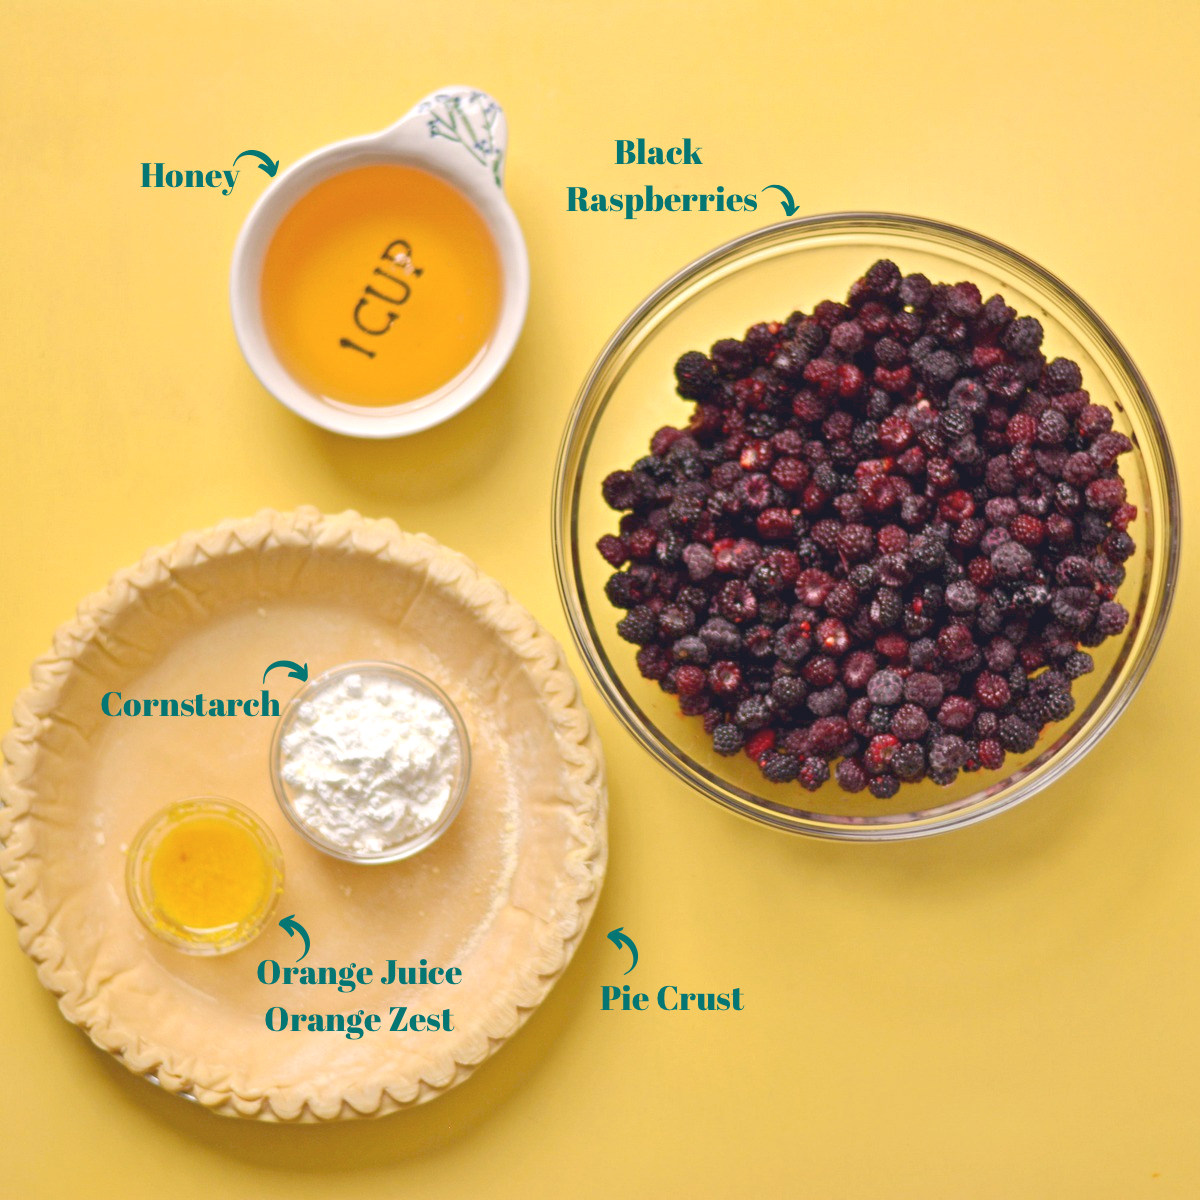
All substitution options are a 1:1 substitution unless noted otherwise.
Black Raspberries: This is the heart and soul of this pie. When ripe, black raspberries are relatively soft and can be a little tart, so they make a delicious pie filling! If you are picking them fresh, you will know they are ready because they should nearly fall off the branch.
Substitutions: While fresh black raspberries are best, red raspberries, blackberries, or huckleberries could be used - fresh or frozen. If frozen, just leave in the fridge the night before to thaw or heat in the microwave to bring to room temp. You could also mix berries or use frozen mixed berries. Black raspberries can sometimes be found at the farmer's market in the northern US during the summer months.
Honey: Black raspberries are on the tart side, so honey adds the sweetness we're looking for in this pie!
Substitutions: Cane or coconut sugar, agave, brown sugar, or maple syrup can be substituted.
Orange Juice and Orange Zest: Citrus is a way to enhance the flavors and the sweetness of natural berries. Typical pies use lemon juice, but because we're using less sugar we wanted to use a sweeter citrus fruit.
Substitutions: Lime juice or lemon juice can be used. Lemon Zest can replace orange zest, this could be swapped out with cinnamon for a hint of cinnamon and a more fall flavor.
Corn starch: Corn starch is used to thicken a berry pie, and is activated when it's heated. When you cook the pie the corn start will react with the berry juices and start to coagulate. This will form the ooey-gooey filling!
Substitutions: Arrowroot powder could be used in place of cornstarch.
Premade Pie Crust: You can make your own crust, but we prefer to use a premade frozen pie crust from the grocery store. At the store you can find them in the freezer aisle, already shaped in a tin pan or rolled in a box. If you want a decorative top you'll need at least one box of the rolled pie crust.
Substitutions: Your favorite crust can be used or you can make your own. You can also omit the bottom crust for a low-carb option and just do fun shapes of crust on the top!
Recipe Testing Notes
Throughout our testing of this Black Raspberry Pie, we learned some key things that worked and didn't work. Here are the key takeaways!
- Raspberries and blackberries work great: We know not everyone has access to tons of black raspberry bushes in the yard, so we tested this pie with frozen raspberries, black berries, and mixed berries and all three worked great!
- You don't need to blind bake: This pie bakes for a while and the filling is not affected by moisture (like a quiche). That being said, we tried it with both blind baking the crust and not blind baking and did not notice a difference. So, save time and don't worry about blind baking.
- Cover in foil: Again, because this pie bakes for a while, the top crust is bound to burn. This is true for any detail work on top and the edge crust, so cover it in foil until the last 25 minutes to prevent burning.
- Crusts shrink: We learned this pretty quick when our crust shrunk leaving no edge on the pie. This is why I recommend using a frozen pie crust that is already shaped in a tin for the bottom crust. If using the roll out kind, you may need to roll two together to make it large enough to comfortably create an edge crust.
How to Make This - Step by Step
Step one: Prep
Preheat the oven to 375 degrees F.
Step two: Mix
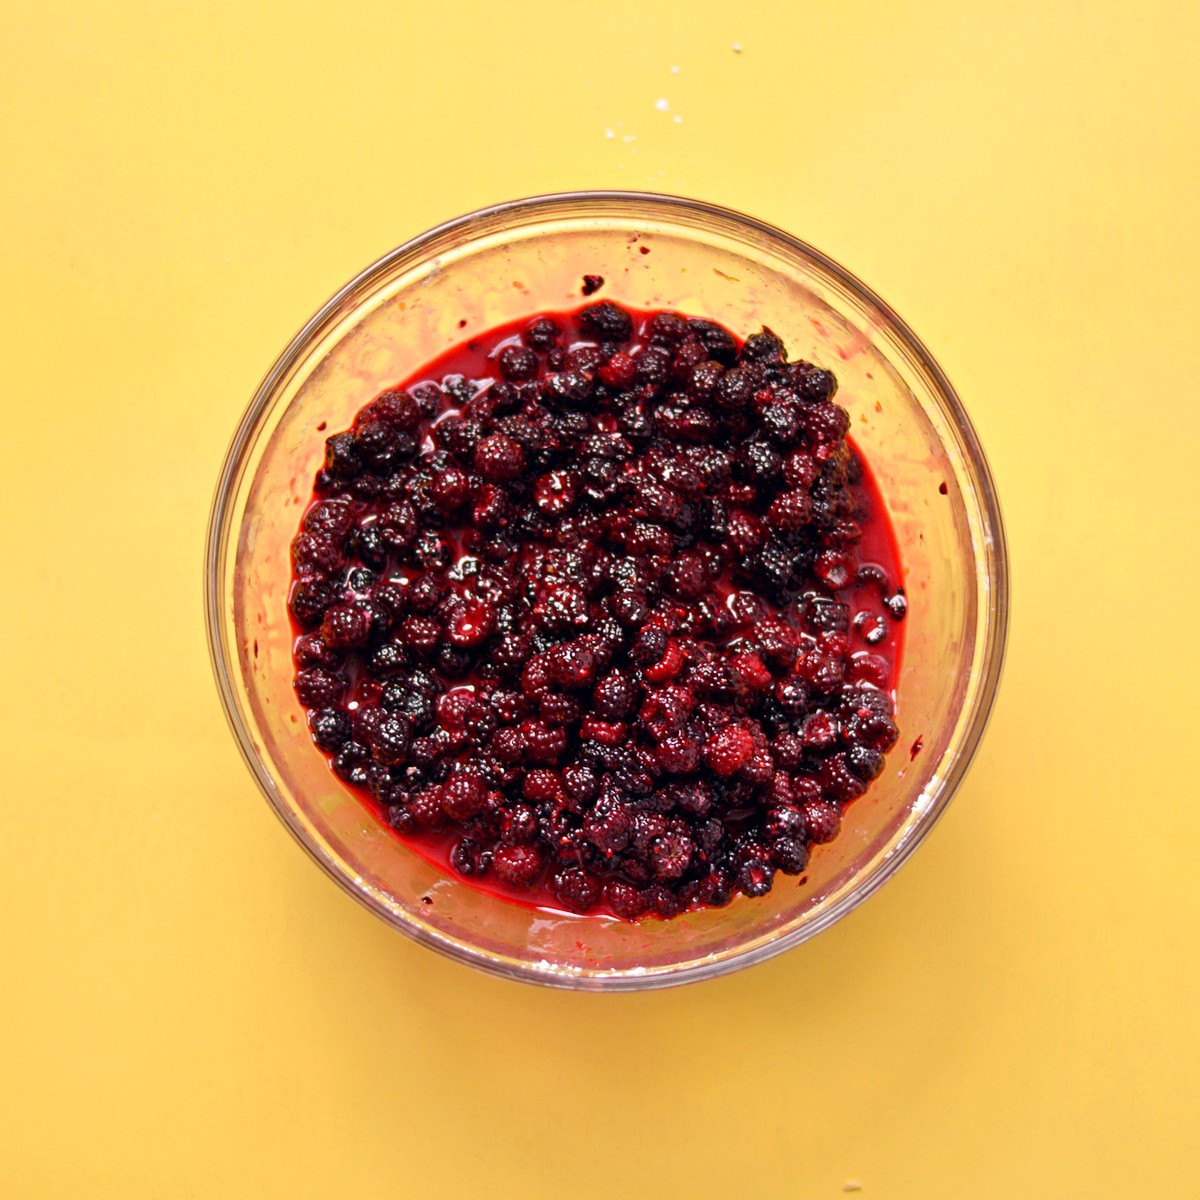
Mix it up! Wash berries, then add all ingredients except the pie crust to a large bowl. Stir to combine. Let this mixture sit for 15 minutes while you prep the pie crust. If this mixture tastes too sweet, add a dash of salt.
Step three: Prep the crust
Prep your pie crust by gently rolling it over the pie pan (9-inch pie plate). Press the crust into the edges of your pan and crimp the edges. The edges should be about an inch over the edge of the pie dish. If your premade pie crust is not large enough, simply roll two together using your hands or a rolling pin. There is no need to blind bake this crust due to the long bake time.
Step four: Put it together.
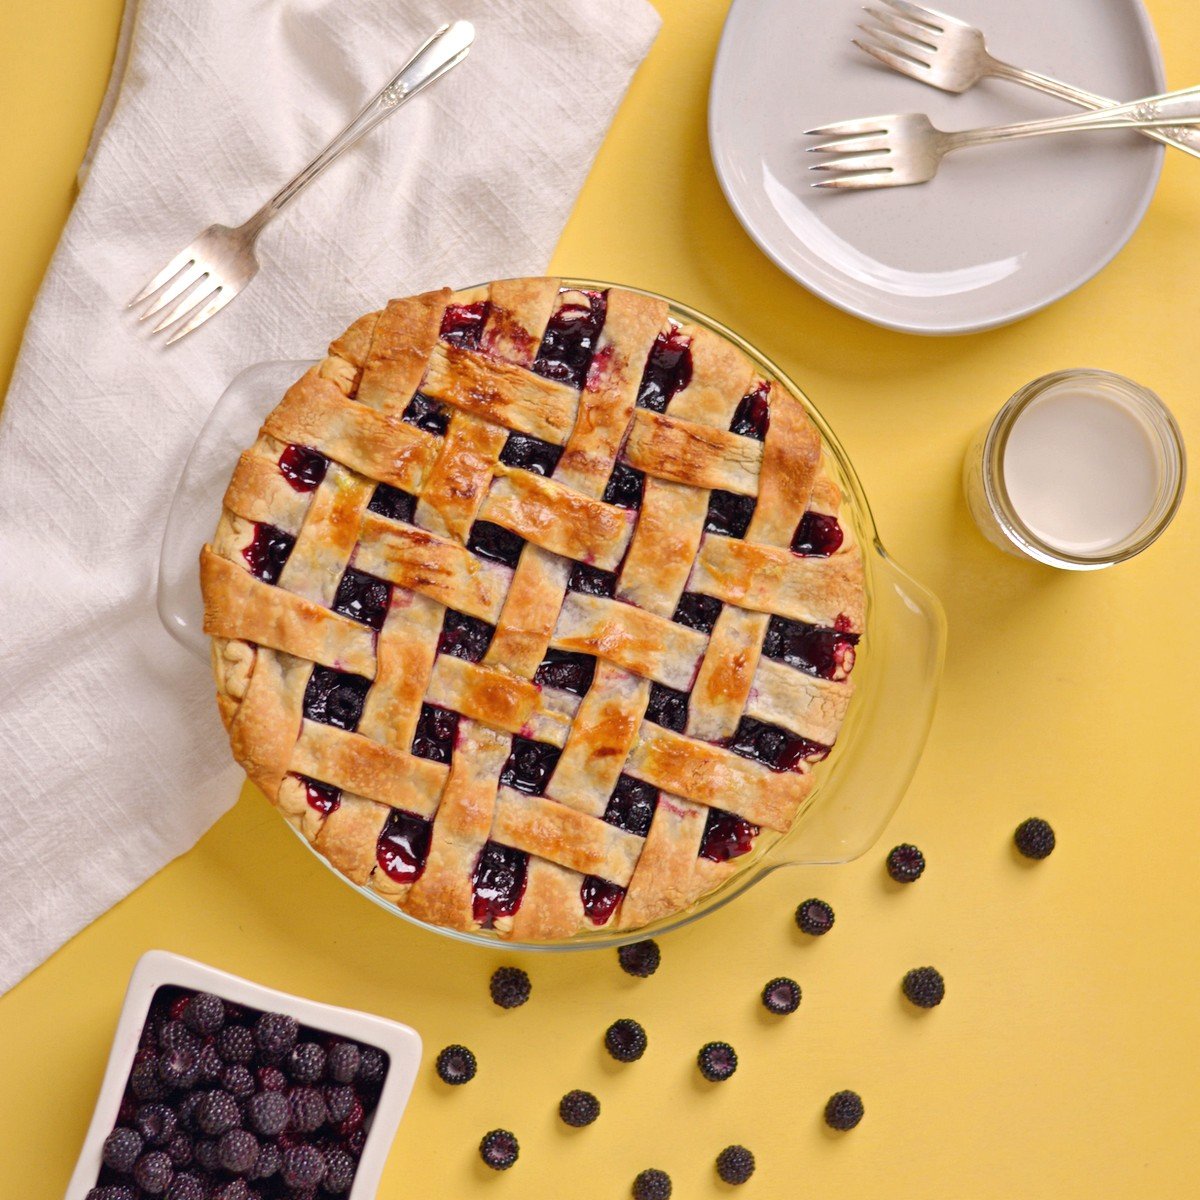
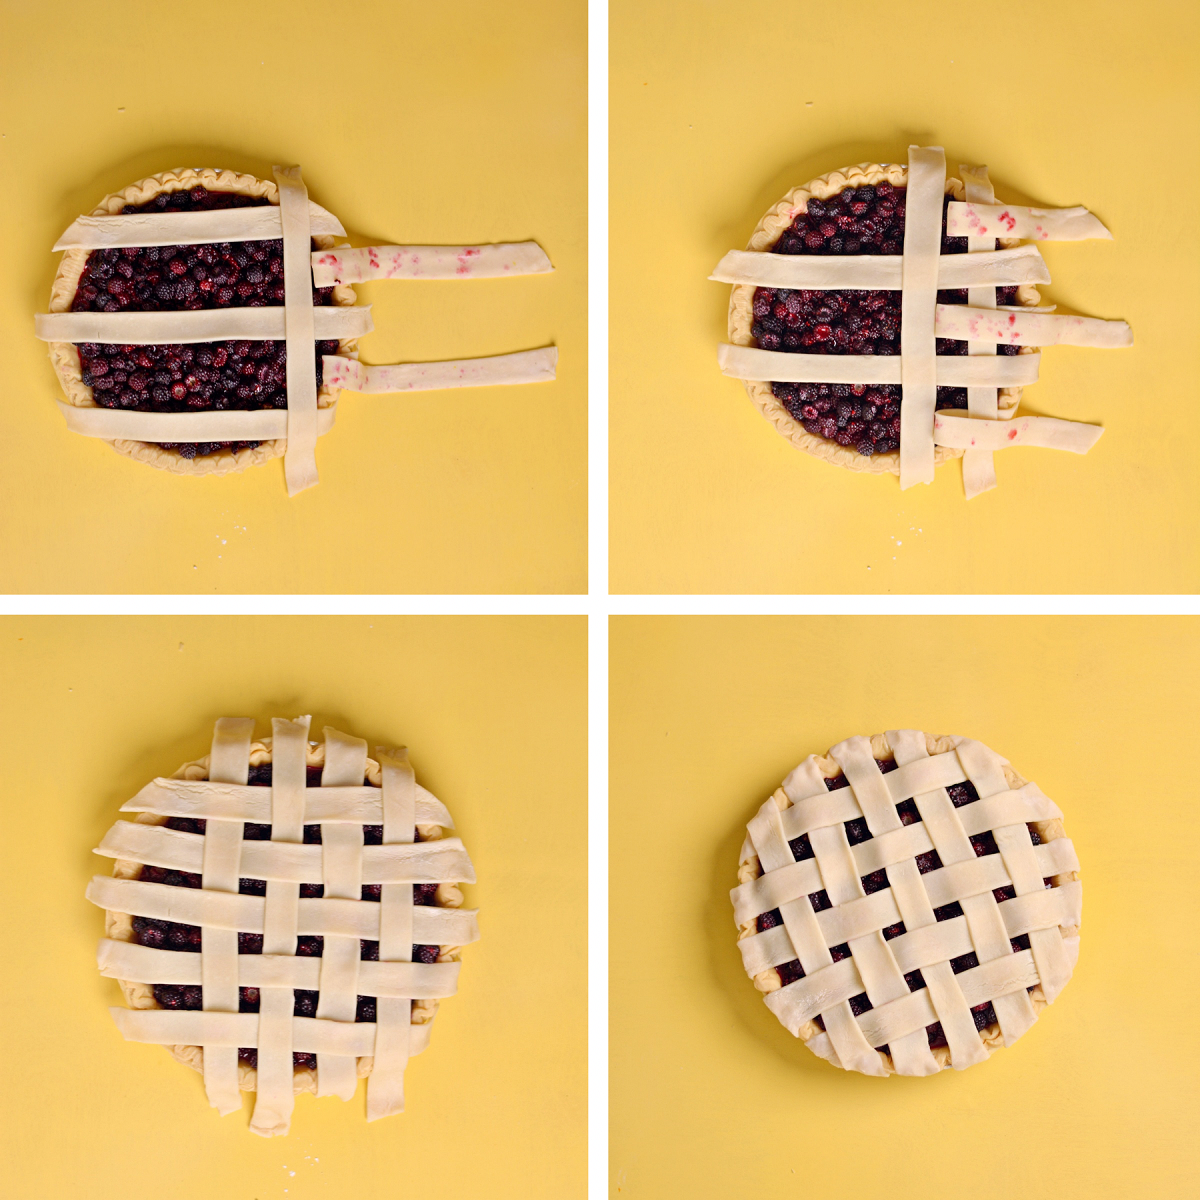
Pour the berry mixture or spoon mixture into the pie shell and smooth the top. Cut out any shapes desired from the remaining pie crust and place them on top of the filling or do a full top crust (full or lattice top). If you want to do a lattice, check out the step-by-step instructions below with helpful process images.
- Cut 10- 1" strips
- Lay out 5 strips horizontally, then fold back every other one
- Lay 1 strip perpendicular (vertical) to them and then lay the folded horizontal pieces back across the pie
- No fold back the opposite horizontal pieces from which you did last time. These pieces will be underneath the vertical piece.
- Lay another vertical piece and then lay the folded pieces back across the pie.
- Repeat this process until you have lattice across the entire pie.
- Cut any excess off the edges and gently press the edges into the crimped pie edge.
Step five: Bake
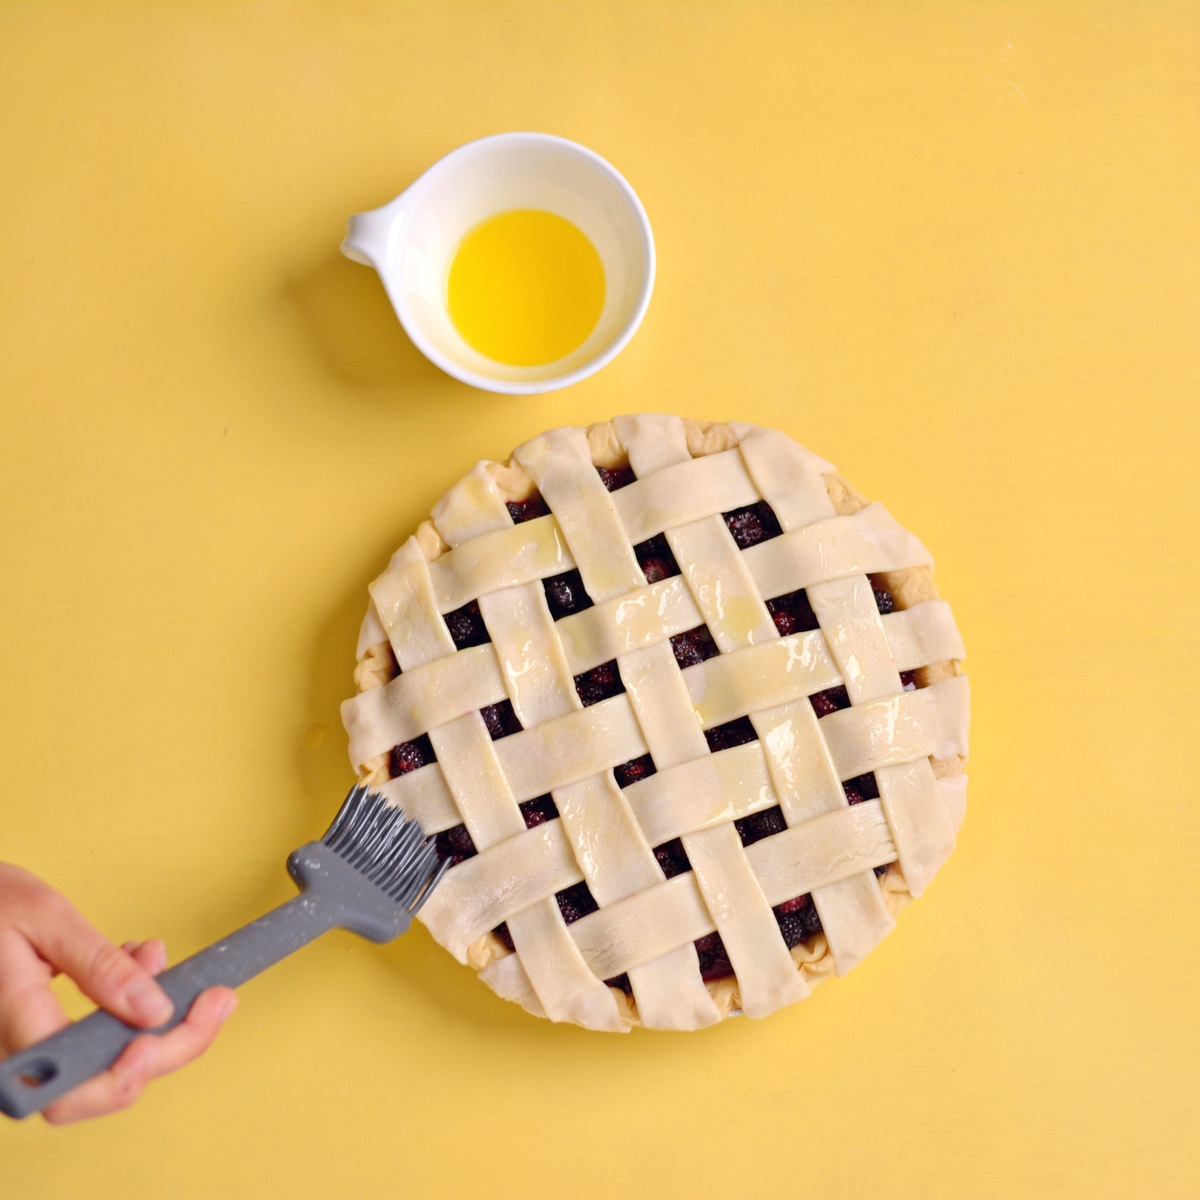
If you are doing any toppings (lattice or shapes), cover the top in aluminum foil to keep it from burning, remove this foil for the last 25-30 minutes of the bake time. You can brush the top with an egg wash or butter prior to baking and underneath the foil. This will get that golden crust but it is not required for a great pie. Place pie in the oven and bake for 50-55 minutes until the top is golden brown and the filling is bubbling. It can be helpful to bake the pie sitting on a sheet tray in case any filling overflows.
Step six: Cool
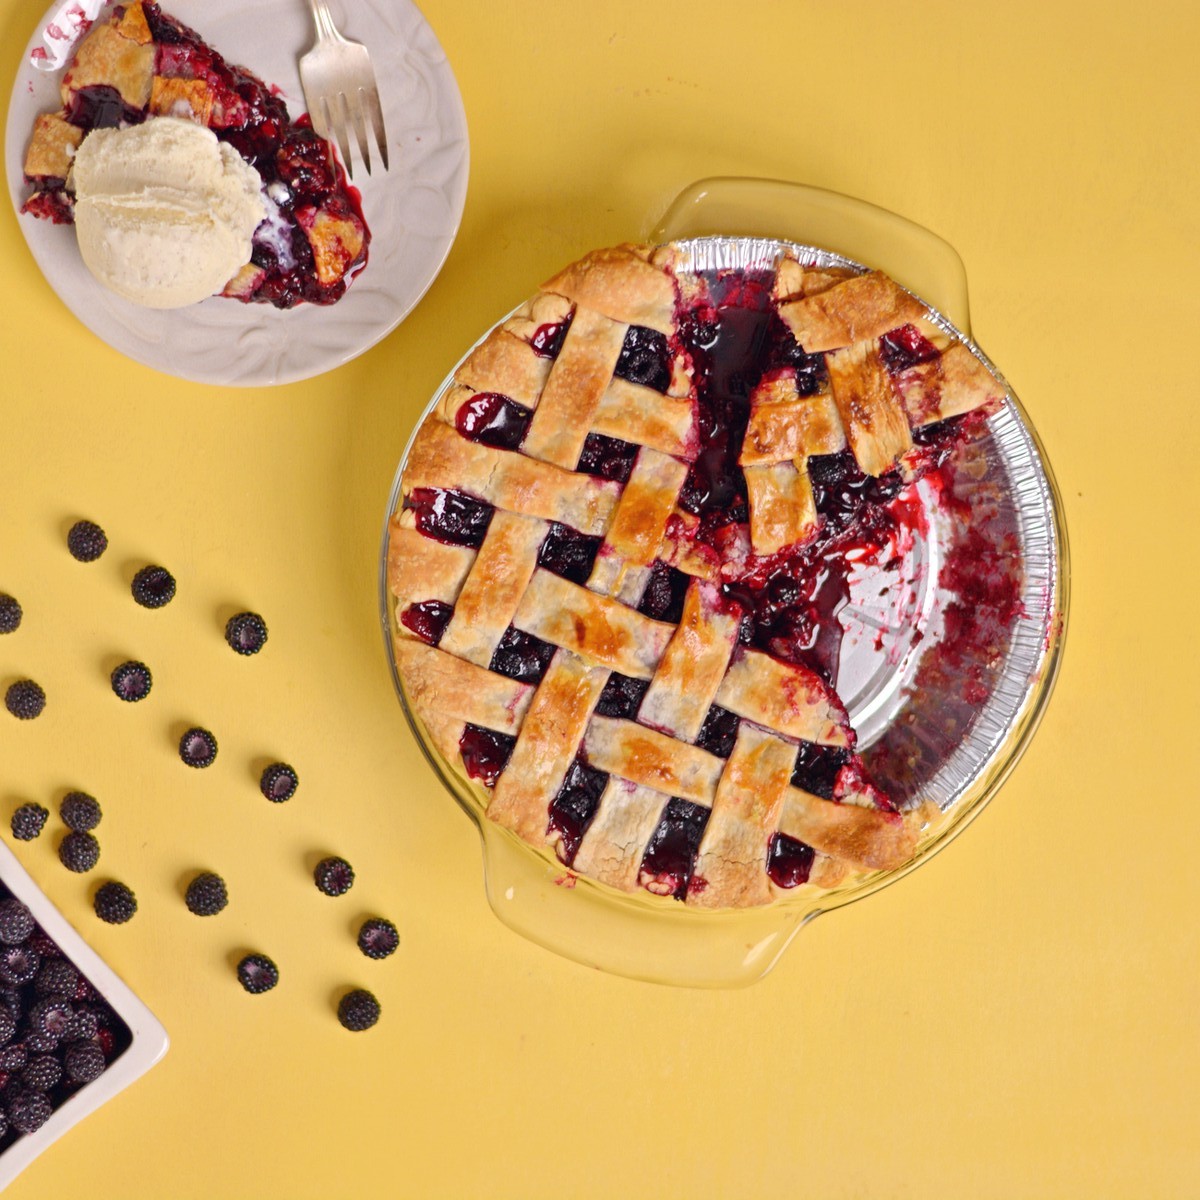
Let cool for 30 minutes before serving, preferably on a wire rack. Then, enjoy this delicious pie for dessert tonight! It's our favorite kind of pie for summer!
Watch How to Make this - Step by Step
Joy Tip!
Use a frozen pie crust that is already shaped and in a tin. This prevents having any issues with the crust being too small for your pie tin. Then use the roll out crusts for the top. These usually come in a two pack so you will have plenty of crust to make fun shapes or a lattice.
Facts and Common Questions
You can definitely mix fresh and frozen berries in your pie! Berries are small so they'll defrost quickly. Also, you're cooking the pie at a low temperature for a long time which will allow both fresh and frozen berries to release their natural juices.
You can tell when your berry pie is done when the filling is bubbling and the crust is golden brown. The filling may be bubbling and appear thin, but it will thicken when you take it out of the oven and let it rest.If you don't cook your pie long enough the filling won't have time to get ooey-gooey from the corn starch activating. If you cook your pie too long the crust could burn.
Yes and no, I don’t have a favorite but if you have any dietary restrictions, be sure to check the ingredients list. Here’s a great homemade recipe (gluten-free and vegan) if you are feeling ambitious! I grew up making blackberry pie with both homemade and store-bought crust and honestly, either is great!
Want to Save it for Later? Here’s how!
This pie can be frozen or refrigerated. Check out how!
Fridge: Store this pie in the fridge in an airtight container or tightly wrapped in plastic wrap for up to a week.
Freezer: To store this pie in the freezer, place it in an airtight container or keep it in the pie dish with a cover/wrap on top. It will keep for 2-3 months in the freezer. Check out our post on how to reheat frozen pie here!
Fun Fact!
Black Raspberries are similar to a raspberry but dark purple or black in color and wild ones are quite small and very sweet. My explanation of the flavor of black raspberries is like nature's jelly bean. They grow in wet northern climates and are usually seen in Oregon. Black raspberries get their dark purple color from anthocyanins which are powerful antioxidant flavonoids. Many fruits have this antioxidant, like blackberries and blueberries, but black raspberries are considered the “King Berry” because it has the highest concentration of antioxidants of any fruit! Talk about cool! Ok, got to go eat some pie now to get my antioxidant fill in. (Source)
Pie Pairings
Need something to go with your pie? Try some of our favorites!
- Summer Fruit Salad: This salad is the perfect pairing for a summer dinner on the deck. Fruit salad, grilling, and berry pie - yum!
- Pulled Beef Burger: Talk about summer in a bite! Serve this burger with you favorite BBQ sauce next to the berry pie!
- No Churn Ice Cream: There is nothing more classic than pie and ice cream!
Did you try this and love it? Leave us a review, we would love to hear from you!
Recipe
Easy Black Raspberry Pie
Ingredients
- 1 each frozen pie crust (or 2 if doing top design*)
- 6 cups black raspberries (or mixed berries)
- 1 cup honey
- 1 tablespoon orange juice
- 1 each zest from one orange
- 6 tablespoon corn starch
Before you start!
If you make this recipe, please take a moment to leave us a review. We love to hear from you!
Instructions
- Preheat the oven to 375 degrees.
- Add all ingredients except the pie crust to a large bowl. Stir gently to combine. Let this mixture sit for 15 minutes while you prep the pie crust.
- Prep your pie crust by gently rolling it over the pie dish. Press the crust into the edges of your pan and crimp the edges. The edges should be about an inch over the edge of the pie dish. If your premade pie crust is not large enough, simply roll two together using your hands or a rolling pin. There is no need to blind bake this crust due to the long bake time.
- Pour the filling into the pie crust and smooth the top. Cut out any shapes desired from the remaining pie crust and top the pie with it.
- Cover the top and edges in foil to keep any designs from burning, remove this foil for the last 25-30 minutes of the bake. Bake for 50-55 minutes until the top is golden brown and the filling is bubbling. Let rest 30 minutes before eating to let the filling get very gooey.
Video
Notes
Looking for more information?
Additional substitution information can be found above in the substitution section of this post.
Nutrition Disclaimer
Nutritional information is an estimate and for informational purposes only.

This is the best black raspberry pie I have ever tasted! Love that it used honey instead of processed sugar. Thank you
We are so glad you liked it! Thanks for using our recipe!
This was amazing, I love it with the natural honey! Thanks for sharing the recipe!
This is so good and easy and we love the honey substitute for refined sugar.
Super tasty pie and not too sweet!
We used the berry filling in a cobbler and it was the best berry pie filling I’ve ever had!!! Just the perfect amount of sweetness